Once you have created a curve group, you can add an FX volatility surface to it.
On this page, we will discuss:
- how to add an FX volatility surface
- the market conventions used in Xplain for expiry date calculations
FX Volatility Surface Configuration
The two steps required to configure the FX volatility surface in a curve group are as follows:
- Set up the FX ATM volatility surface, by adding currency pairs and option expiries, and define the interpolation parameters for expiries and moneyness
- Set up the FX volatility skew configuration, if applicable (optional)
At the curve configuration level, you can view and export the ATM volatilities, the butterfly (BF) and risk reversal (RR) data as well as the resulting call / put deltas.
Permissible values for FX volatility surfaces can be found on the FX Volatility Surface Permissible Values page.
Part of our ‘NEW CURVE GROUP’ example that replicates the ‘LONDON’ curve group, this page will guide you through the process of defining the FX volatility surface using two examples: manually adding the ‘EUR/USD’ currency pair with a 1Y expiry point, or importing all the data.
You can download the example *.CSV data import files here ![]() .
.
You can also add other types of curves and volatility surfaces to the curve group. Once all required items have been added, you can proceed to the curve configuration set up page.
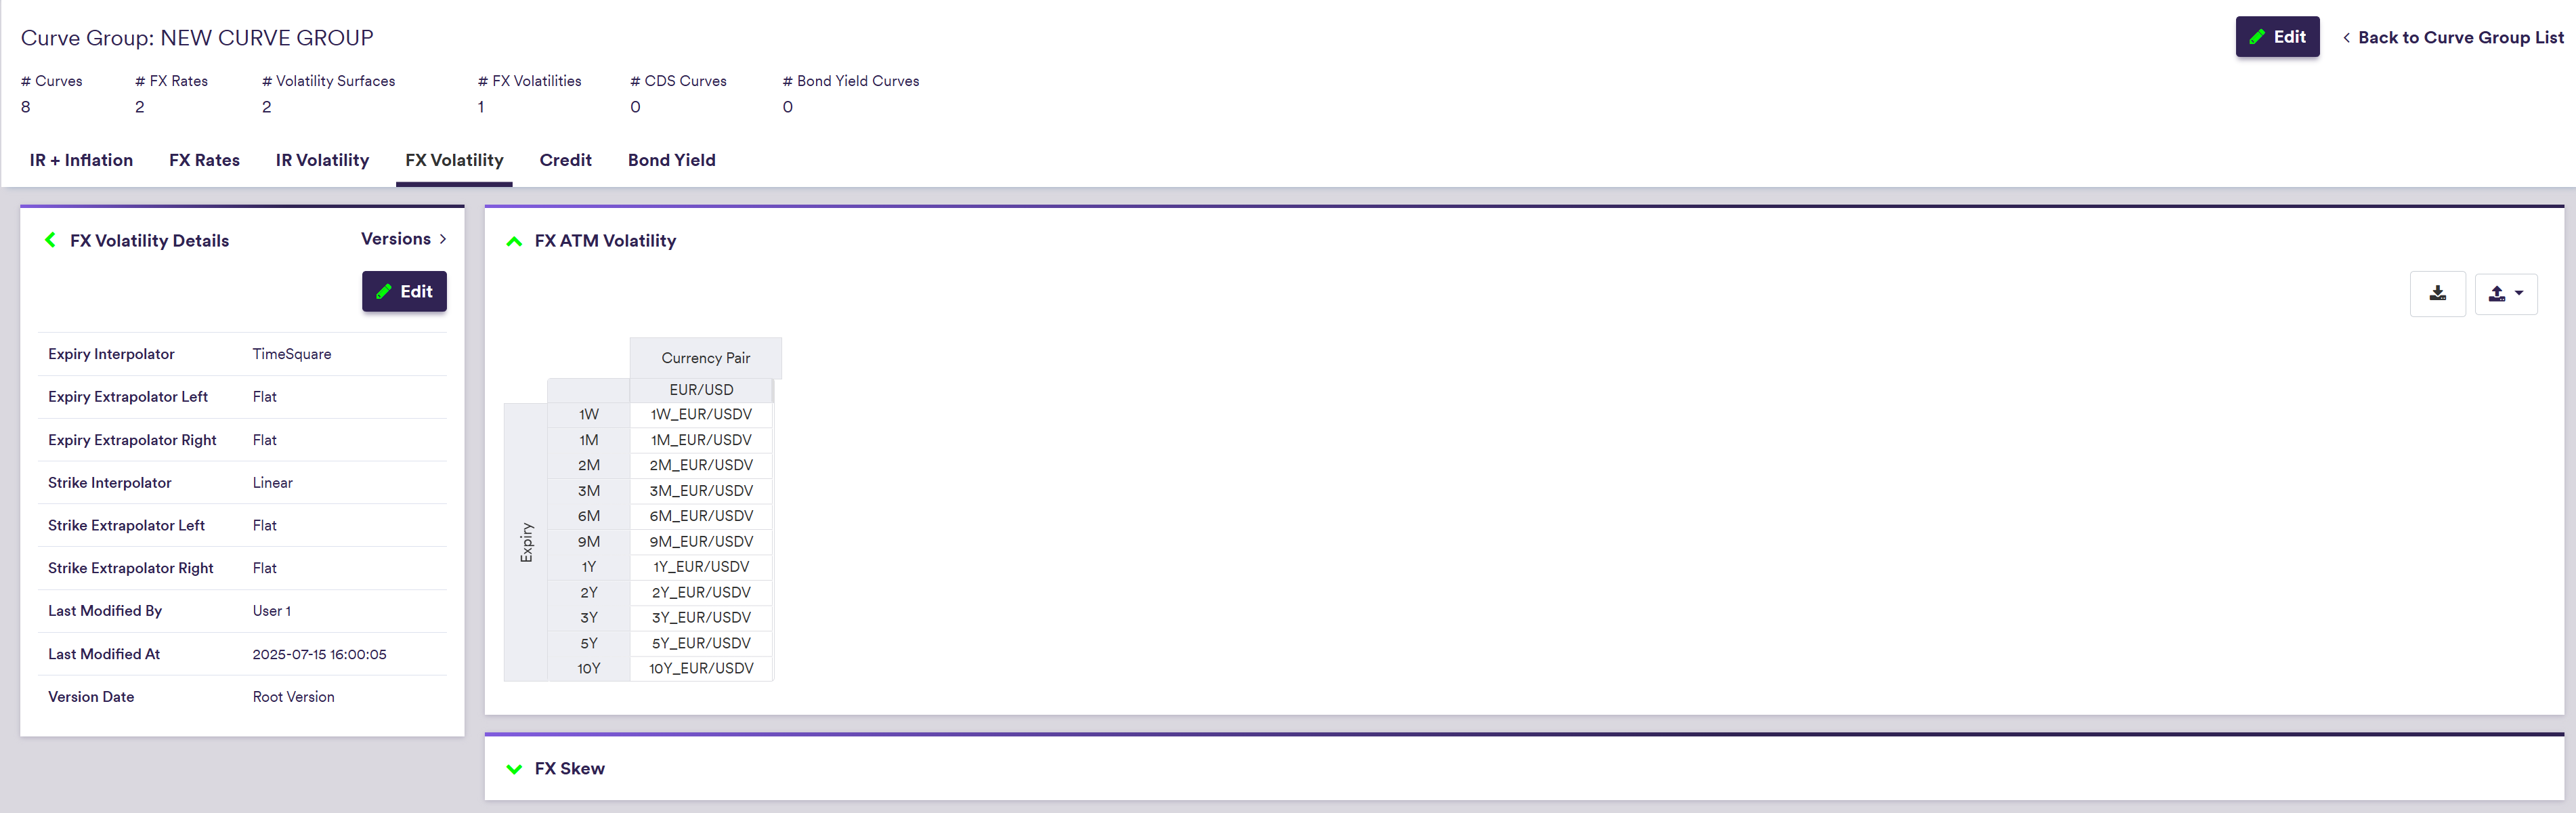
1. Setting Up the FX ATM Volatility Surface
Under

To manually create a volatility surface, click on

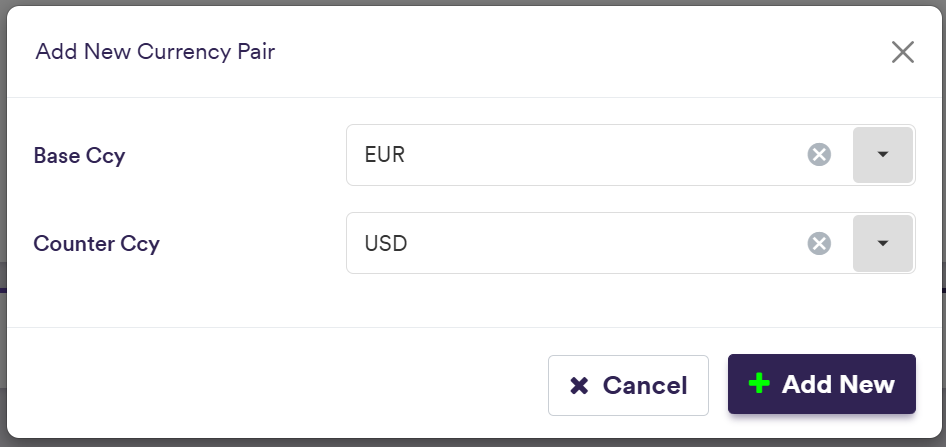
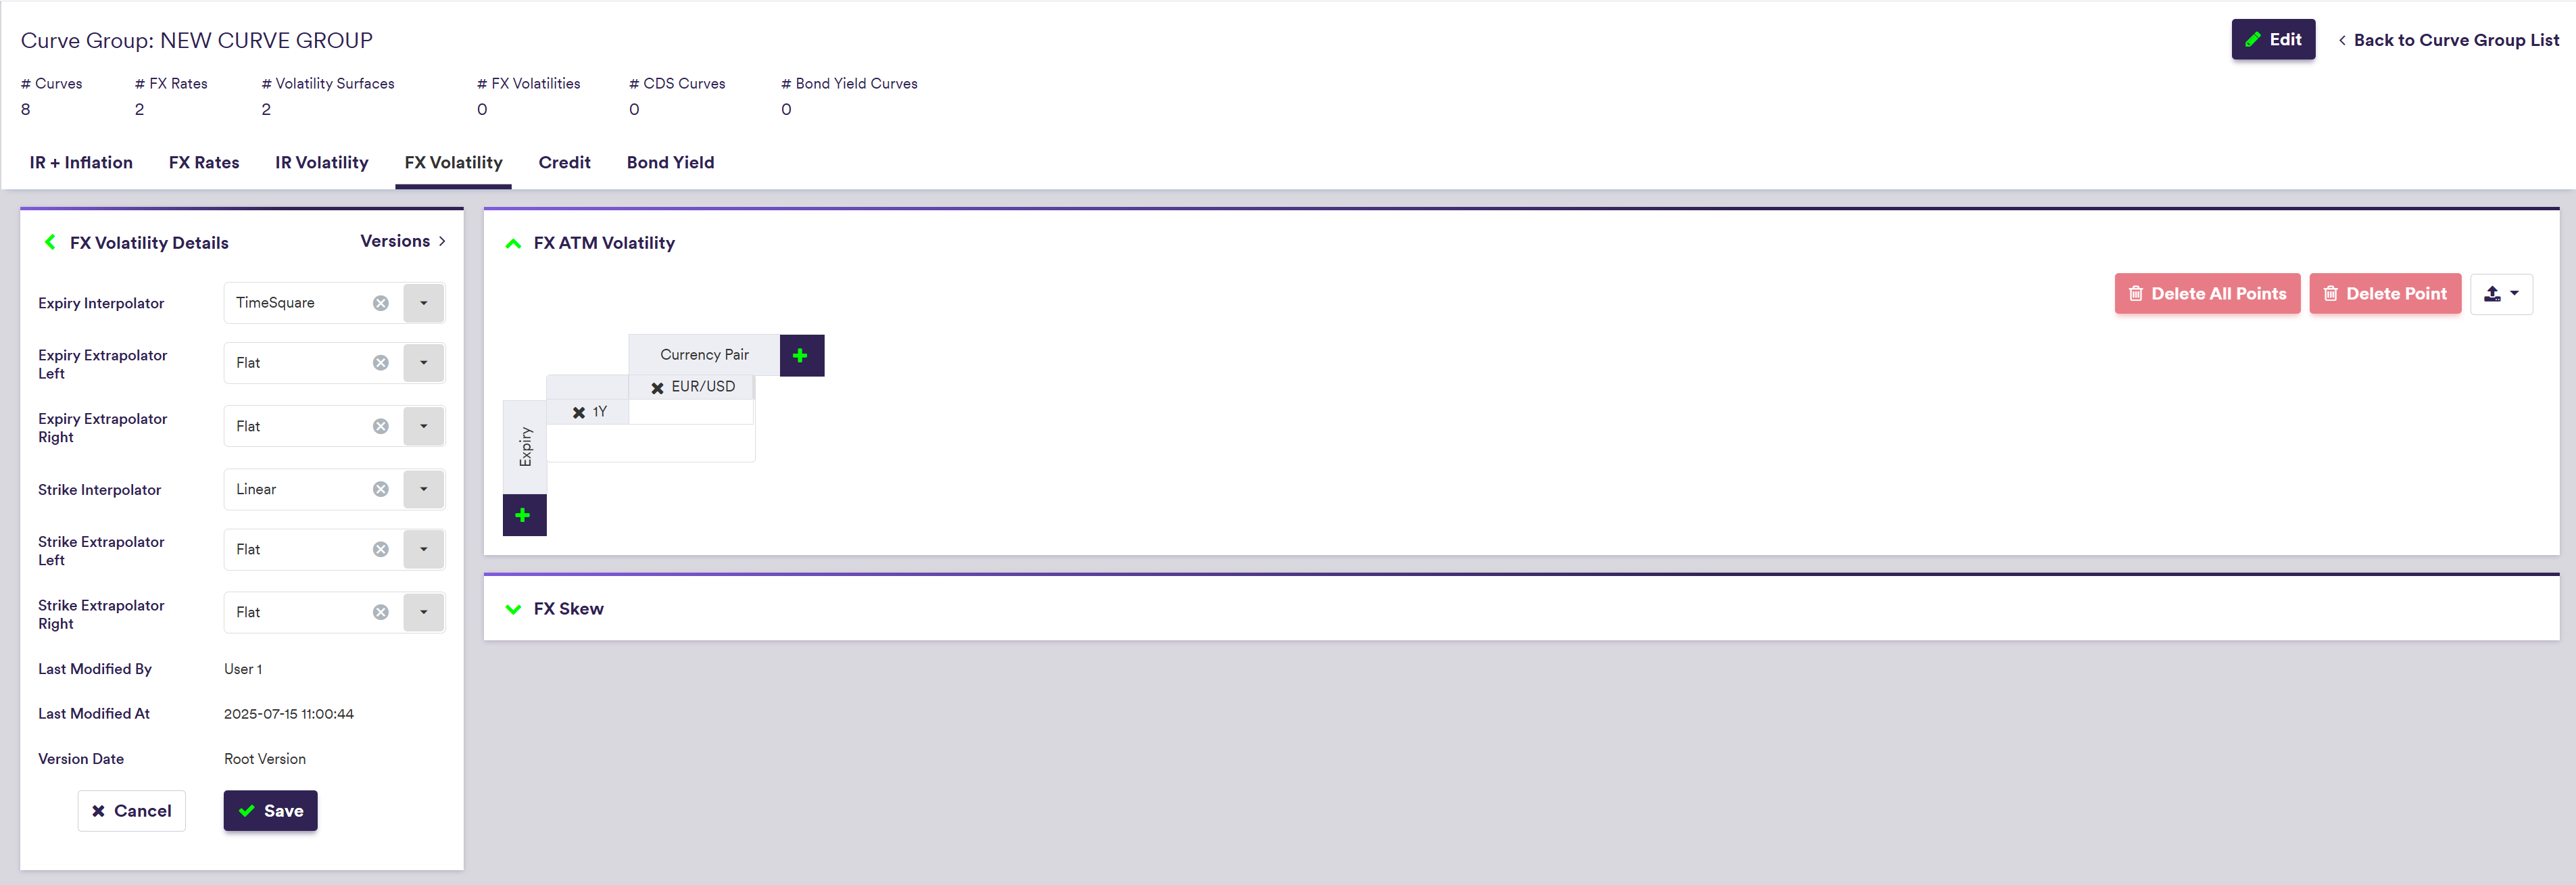
If the FX ATM volatility surface is empty, adding a new Currency Pair will automatically associate it to a 1Y Expiry.
To import a volatility surface (or a list of volatility surfaces), click on (import) and select the relevant FX ATM volatility surface list definition .CSV import file.
You can download the import file template here ![]() .
.

A description of an FX ATM volatility point’s attributes and corresponding permissible values are set out in the table below.
| Field Name | Description | Permissible Values |
|---|---|---|
| Base Ccy | The FX option's underlying base currency. 3-letter ISO 4217 currency code. | Any currency in FX Cat A and FX Cat B |
| Counter Ccy | The FX option's underlying counter currency. 3-letter ISO 4217 currency code. | See FX Rate Rule |
| Expiry | The FX option’s expiry | Any tenor (e.g. 3M, 10Y) |
Permissible currency values can be split into the two categories that are specified here.
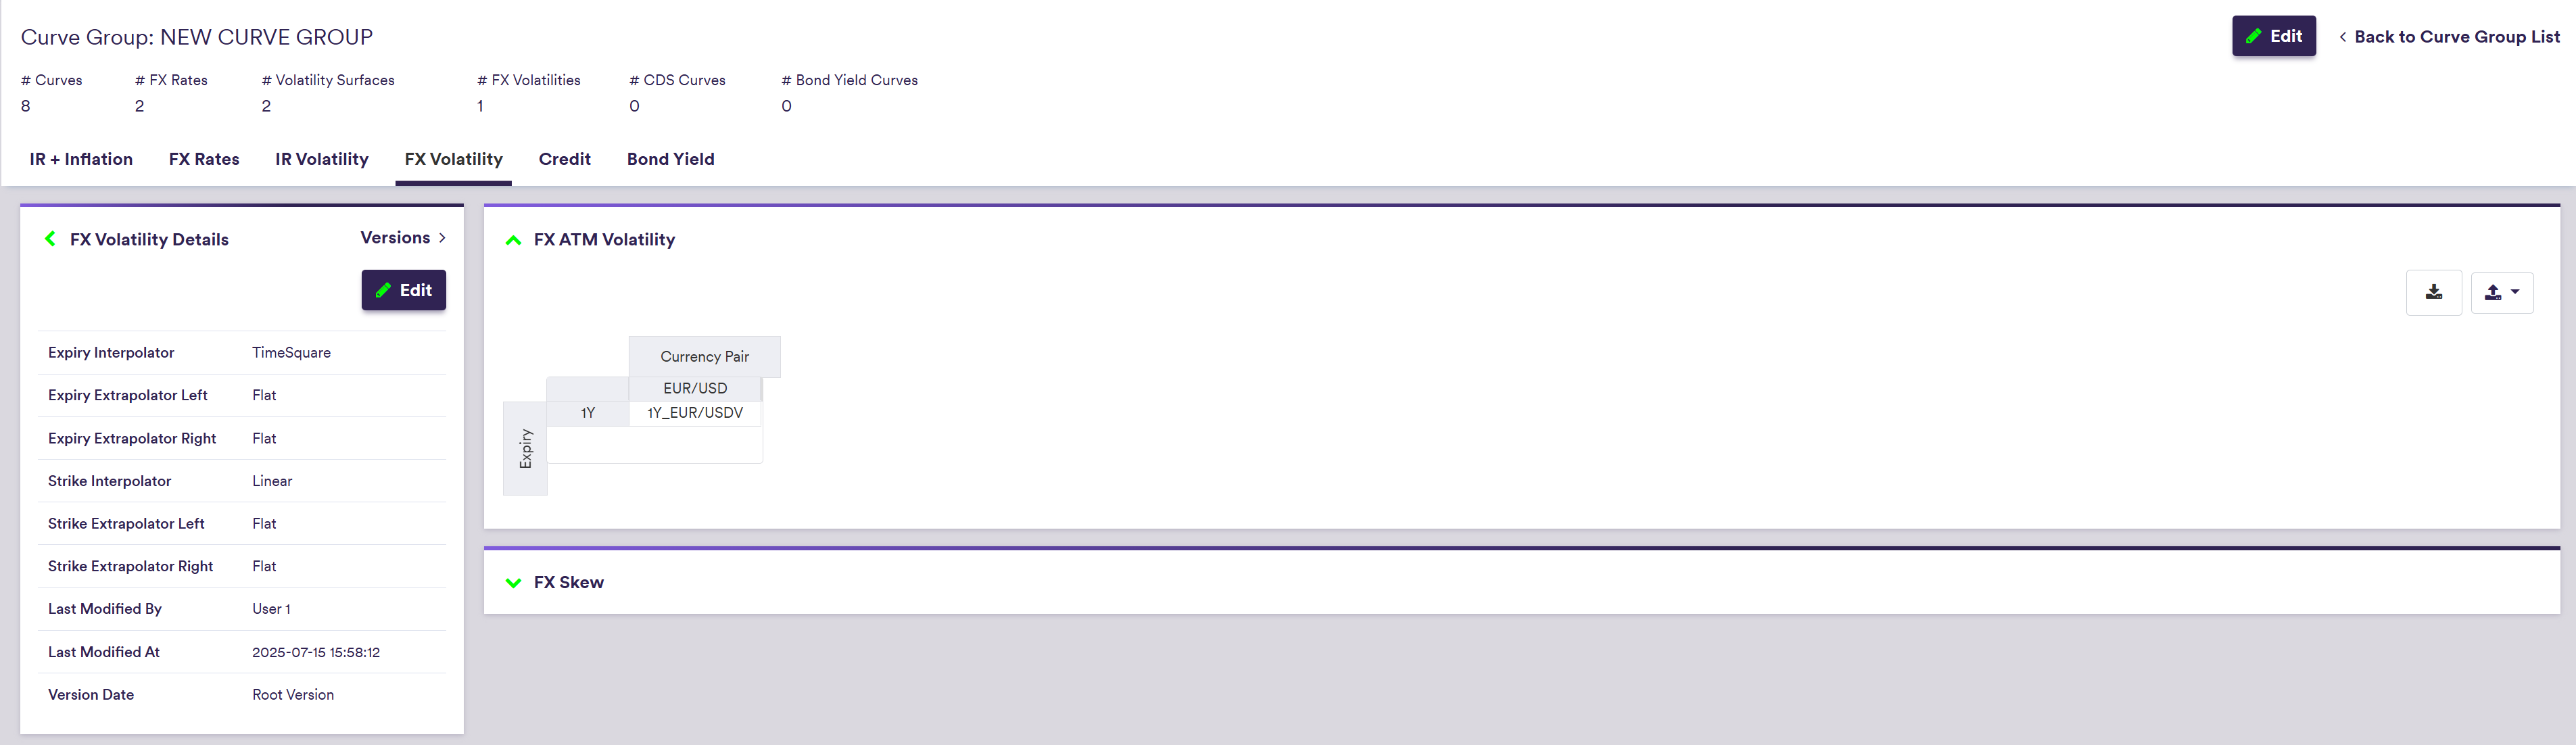
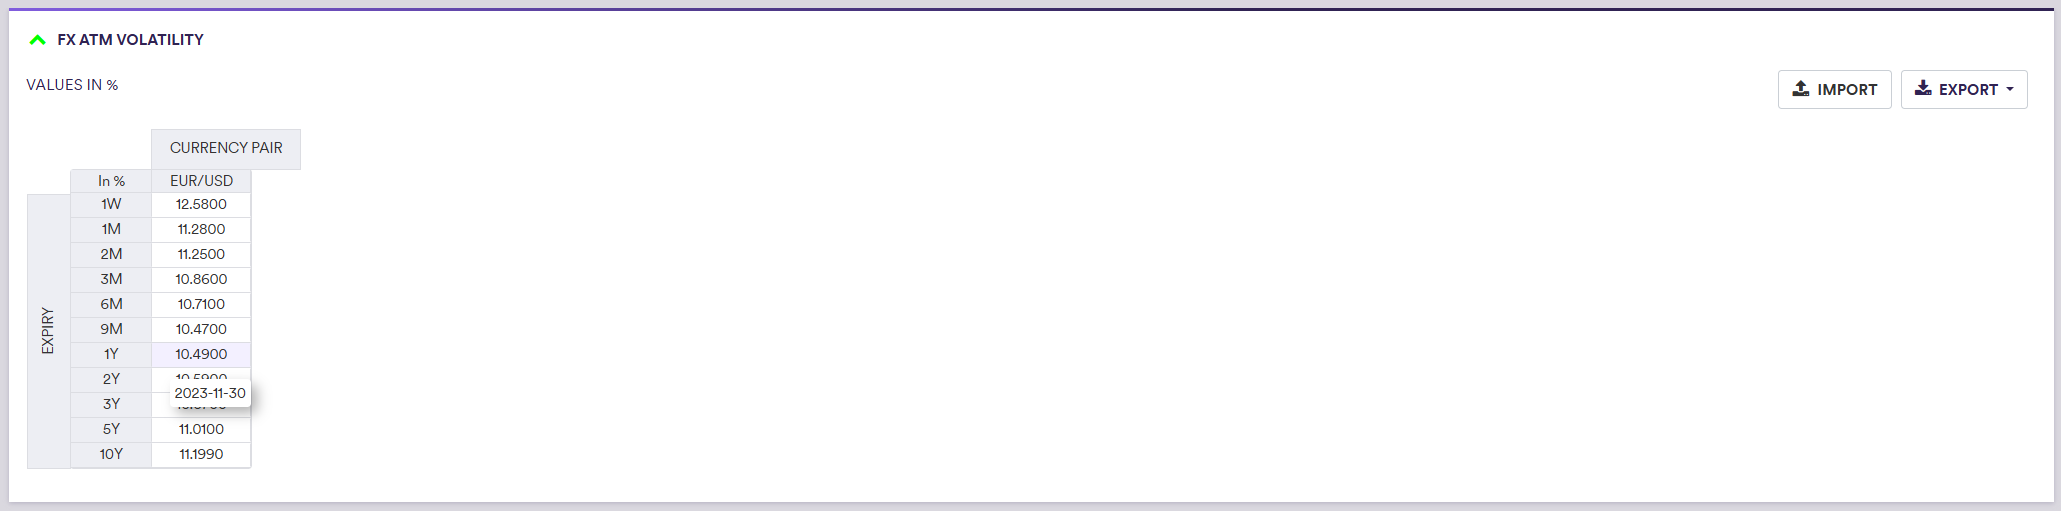
At the curve configuration level, when hovering on the ATM FX volatility for a given currency and a given option tenor, you can see the actual expiry date which will be applicable by reference to the prevailing anchor date.
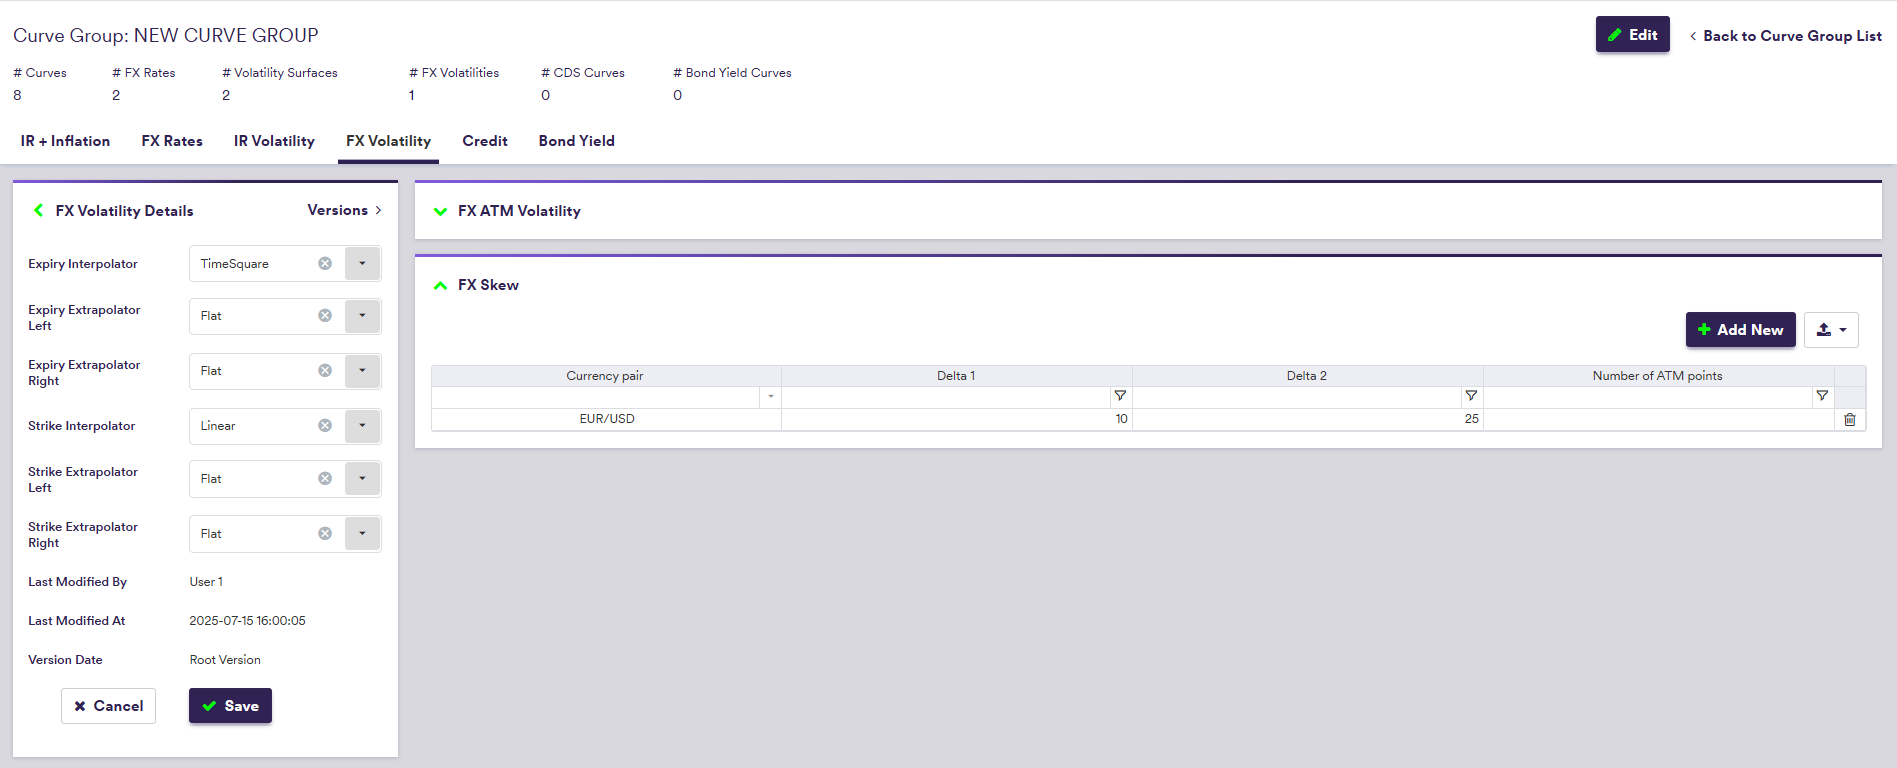
2. Setting Up the FX Volatility Skew Configuration
Under
At the curve configuration level, you can view and export the ATM volatilities, the butterfly (BF) and risk reversal (RR) data as well as the resulting call / put deltas.
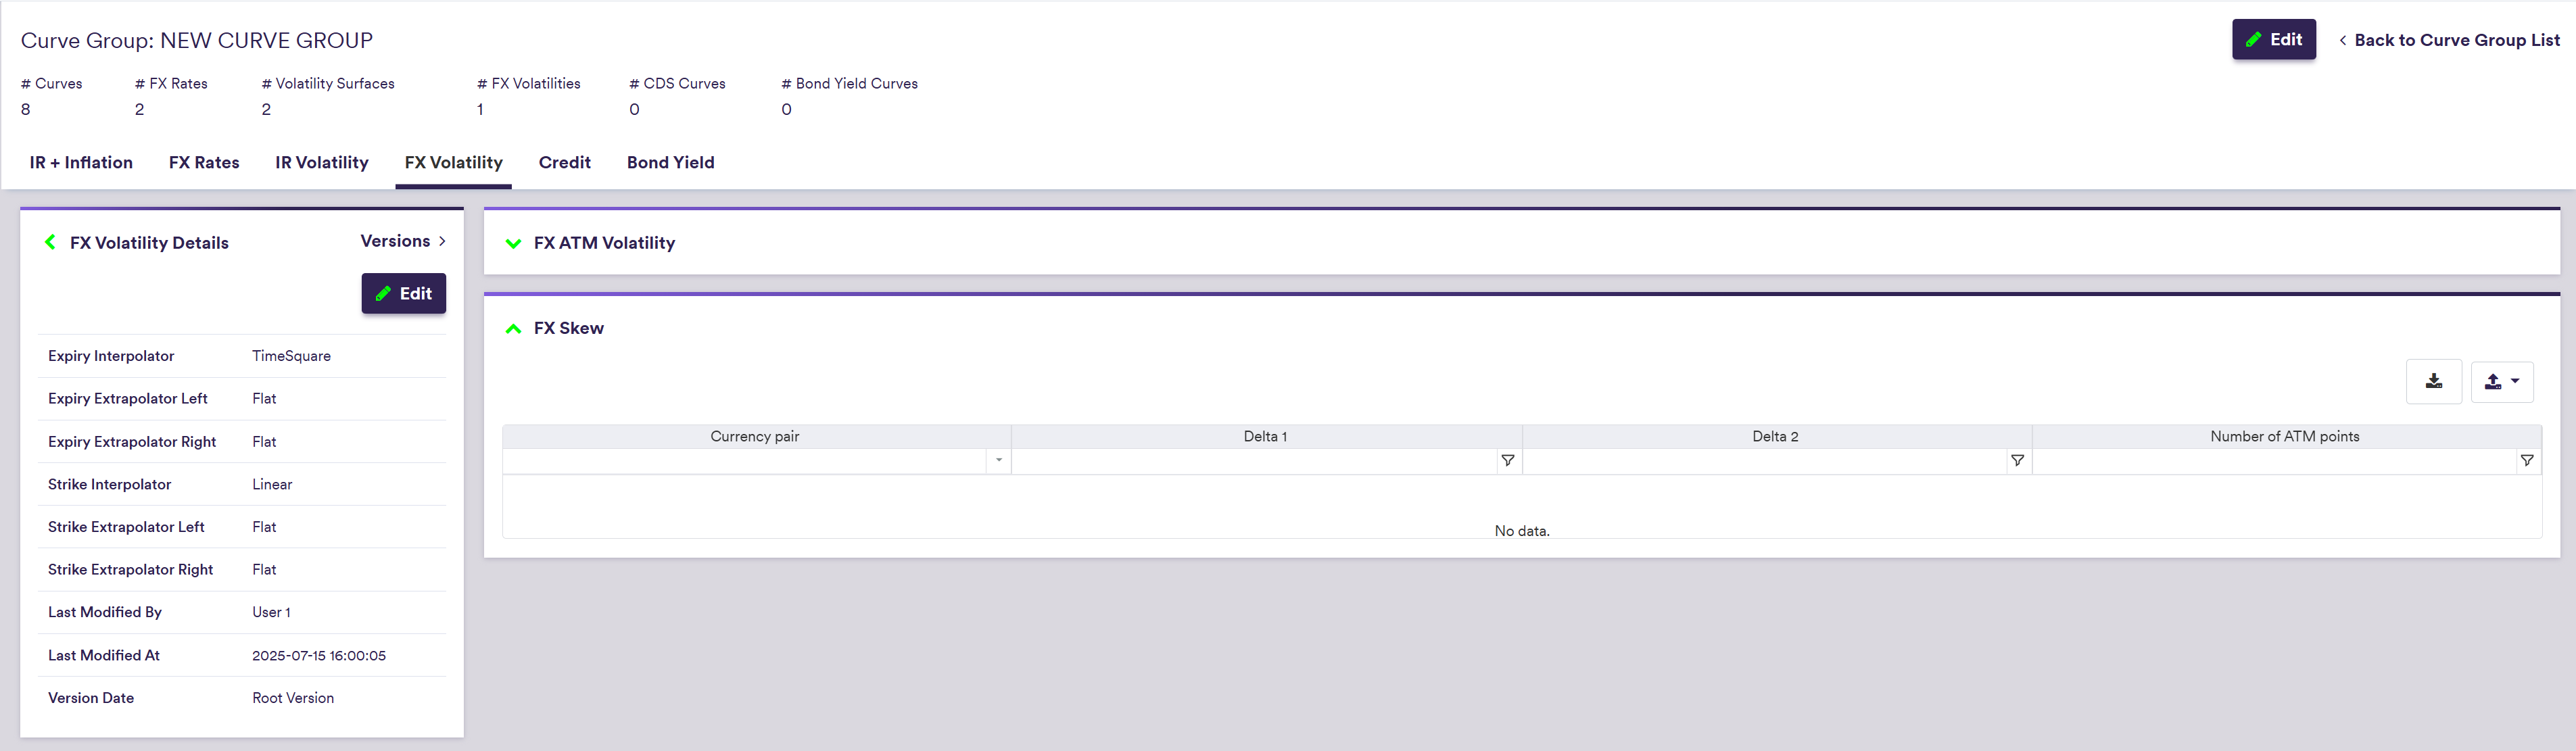
To manually add an FX volatility skew configuration, click on
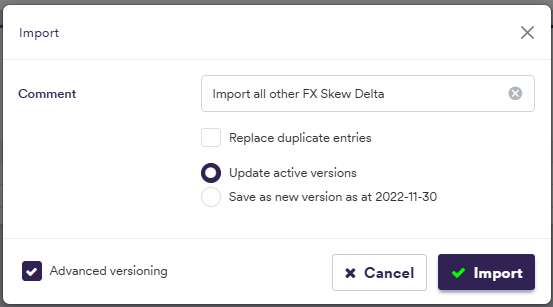
To import an FX volatility skew configuration (or a list of them), click on (import) and select the relevant .CSV import file.
You can download the import file template here ![]() .
.
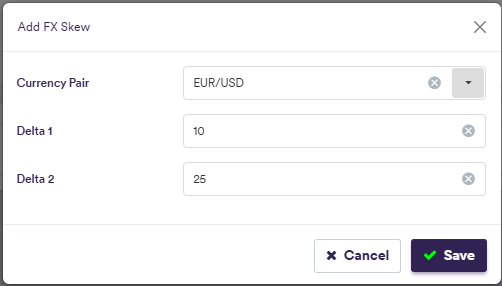
A description of the FX volatility skew’s attributes and corresponding permissible values are set out in the table below.
| Field Name | Description | Permissible Values |
|---|---|---|
| Currency Pair | The FX option’s underlying FX rate | Any existing FX rate |
| Delta 1 | Moneyness (delta) | 10 or 25 |
| Delta 2 | Moneyness (delta) | 10 or 25 |
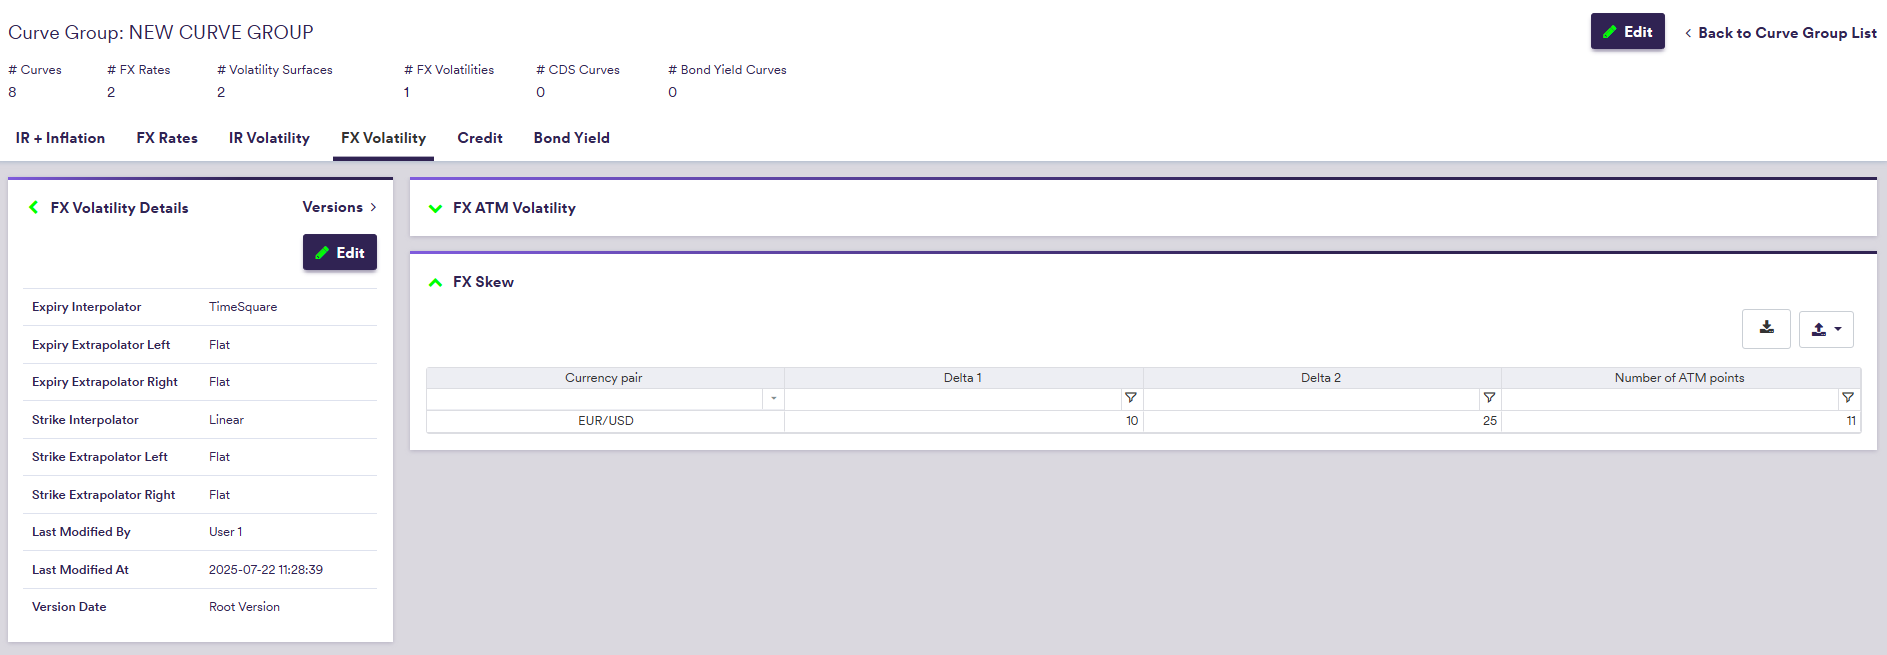
Viewing FX Volatility Skew in Call/Put Delta terms
At the curve configuration level, in the ‘FX Skew’ window, at the currency pair level, you can view and export the FX volatility skew, including the ATM volatilities, the RR/BF data and the resulting call / put deltas.

Expiry Date Calculation Rules
For the purpose of FX volatility interpolation, the market conventions used in Xplain for expiry date calculation are as follows:
If Expiry is expressed in #D or #W
Unadjusted Expiry Date = Valuation Date + Expiry
Expiry Date = BusinessDay[ Unadjusted Expiry Date, Ccy1 calendar and Ccy2 calendar, Following BDC ] (i.e. rolling forward until a good business day for both currencies)
If Expiry is expressed in #M or #Y
Delivery Date = Spot Date + Expiry
Expiry Date = first date prior to Delivery Date whose corresponding Spot Date = Delivery Date
See Spot Date calculation rules.
Once all required curves have been added, you can proceed to the curve configuration set up page.