To get you started with our sandbox environment, we have set up the framework of the step-by-step worked examples that you can follow and replicate, as documented in our user guide.
On this page, we will provide the prerequisites needed to replicate the worked examples.
Prerequisites
The demo usernames, each with the relevant permissions, are as follows:
- User 1 (Super User)
- User 2 (Super User)
We will provide you with the user login details upon request.
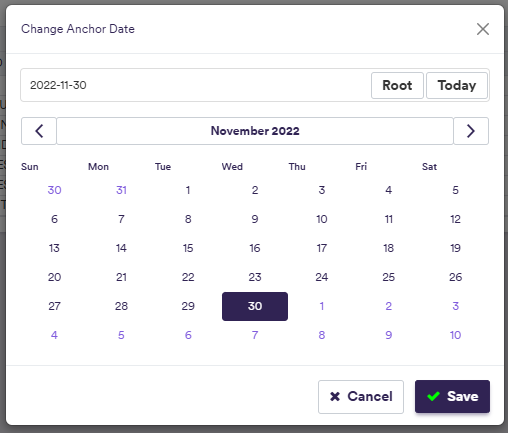
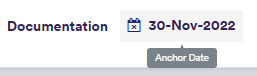
You will need to use at two different usernames to be able to complete the two-stage exception management workflow. You will also need to set the anchor date to 30th November 2022.
As you will learn from our worked examples, you can typically define items in Xplain either manually, or by importing the item’s definition attributes. The example .CSV import files referred to in the user guide can be downloaded under the Import Templates menu.
We also recommend to refer to the Permissible Values menu to get a full description of all inputs for each process.
As to the navigation guidance between Xplain’s various menu items, the path will be provided in this format: e.g.,
First, you will need to set the anchor date for the sandbox environment to 30th November 2022. To do so, click on the anchor date at the top of the screen, select the desired date and click on