On this page, we will provide a description of the approval process for break clearing. This can start as soon as another user has started submitting proposed resolutions, after analysing identified breaks in a valuation data exception management (VD XM) workflow.
On this page, we will provide:
- an overview of the approval process for valuation data break clearing
- a description of the approval actions and corresponding permissible values, which apply to sll break resolutions
Once breaks are resolved and approved, you can view and export the results of the exception management process, including Overlay I or OverlayII cleansed data (as applicable) and valuation data source (as described below).
Overview
Once proposed resolutions have started being submitted in respect of identified valuation data breaks, you will need to:
- check out the relevant approval task
- at the task level, apply a (collective) approval action on selected VDKs with a break (as described below)
In case of rejection, the resolution process will need to be repeated. Given the nature of the two-stage VD XM workflow, you will not be able to approve your own proposed resolutions.
At the task level, the approval process will be as follows (similar to the resolution process):
- for each VDK with breaks, you can
APPLY your validation or rejection of the proposed resolution either collectively (on all or on a sub-selection of filtered or explicitly selected items) or individually.(1) - applied approval for selected items can be undone by clicking on
RESET . - you can submit applied approval actions “as-you-go” by clicking on
SUBMIT or CTRL+ENTER / CMD+ENTER on your keyboard (2) - an approval task can be cancelled as a whole at any point by clicking on
CANCEL (3)
Approval Task for Valuation Data Breaks
In this section, we will illustrate with a worked example how to approve valuation data overlay II break resolutions. The same process will apply to overlay I break resolutions.
In our example, we had an overlay II valuation data break (PvS Vega test) that was resolved with the overall ‘Switch to P2’ action.
Under

Once proposed resolutions have been submitted for approval, a different user to the resolver can check out a task by double-clicking on the line item or selecting a series of tasks and clicking on

The status of the selected clearing task(s) will go from ‘PENDING_APPROVAL’ to ‘IN_APPROVAL’ until completed, when it (they) will disappear from the live task list.
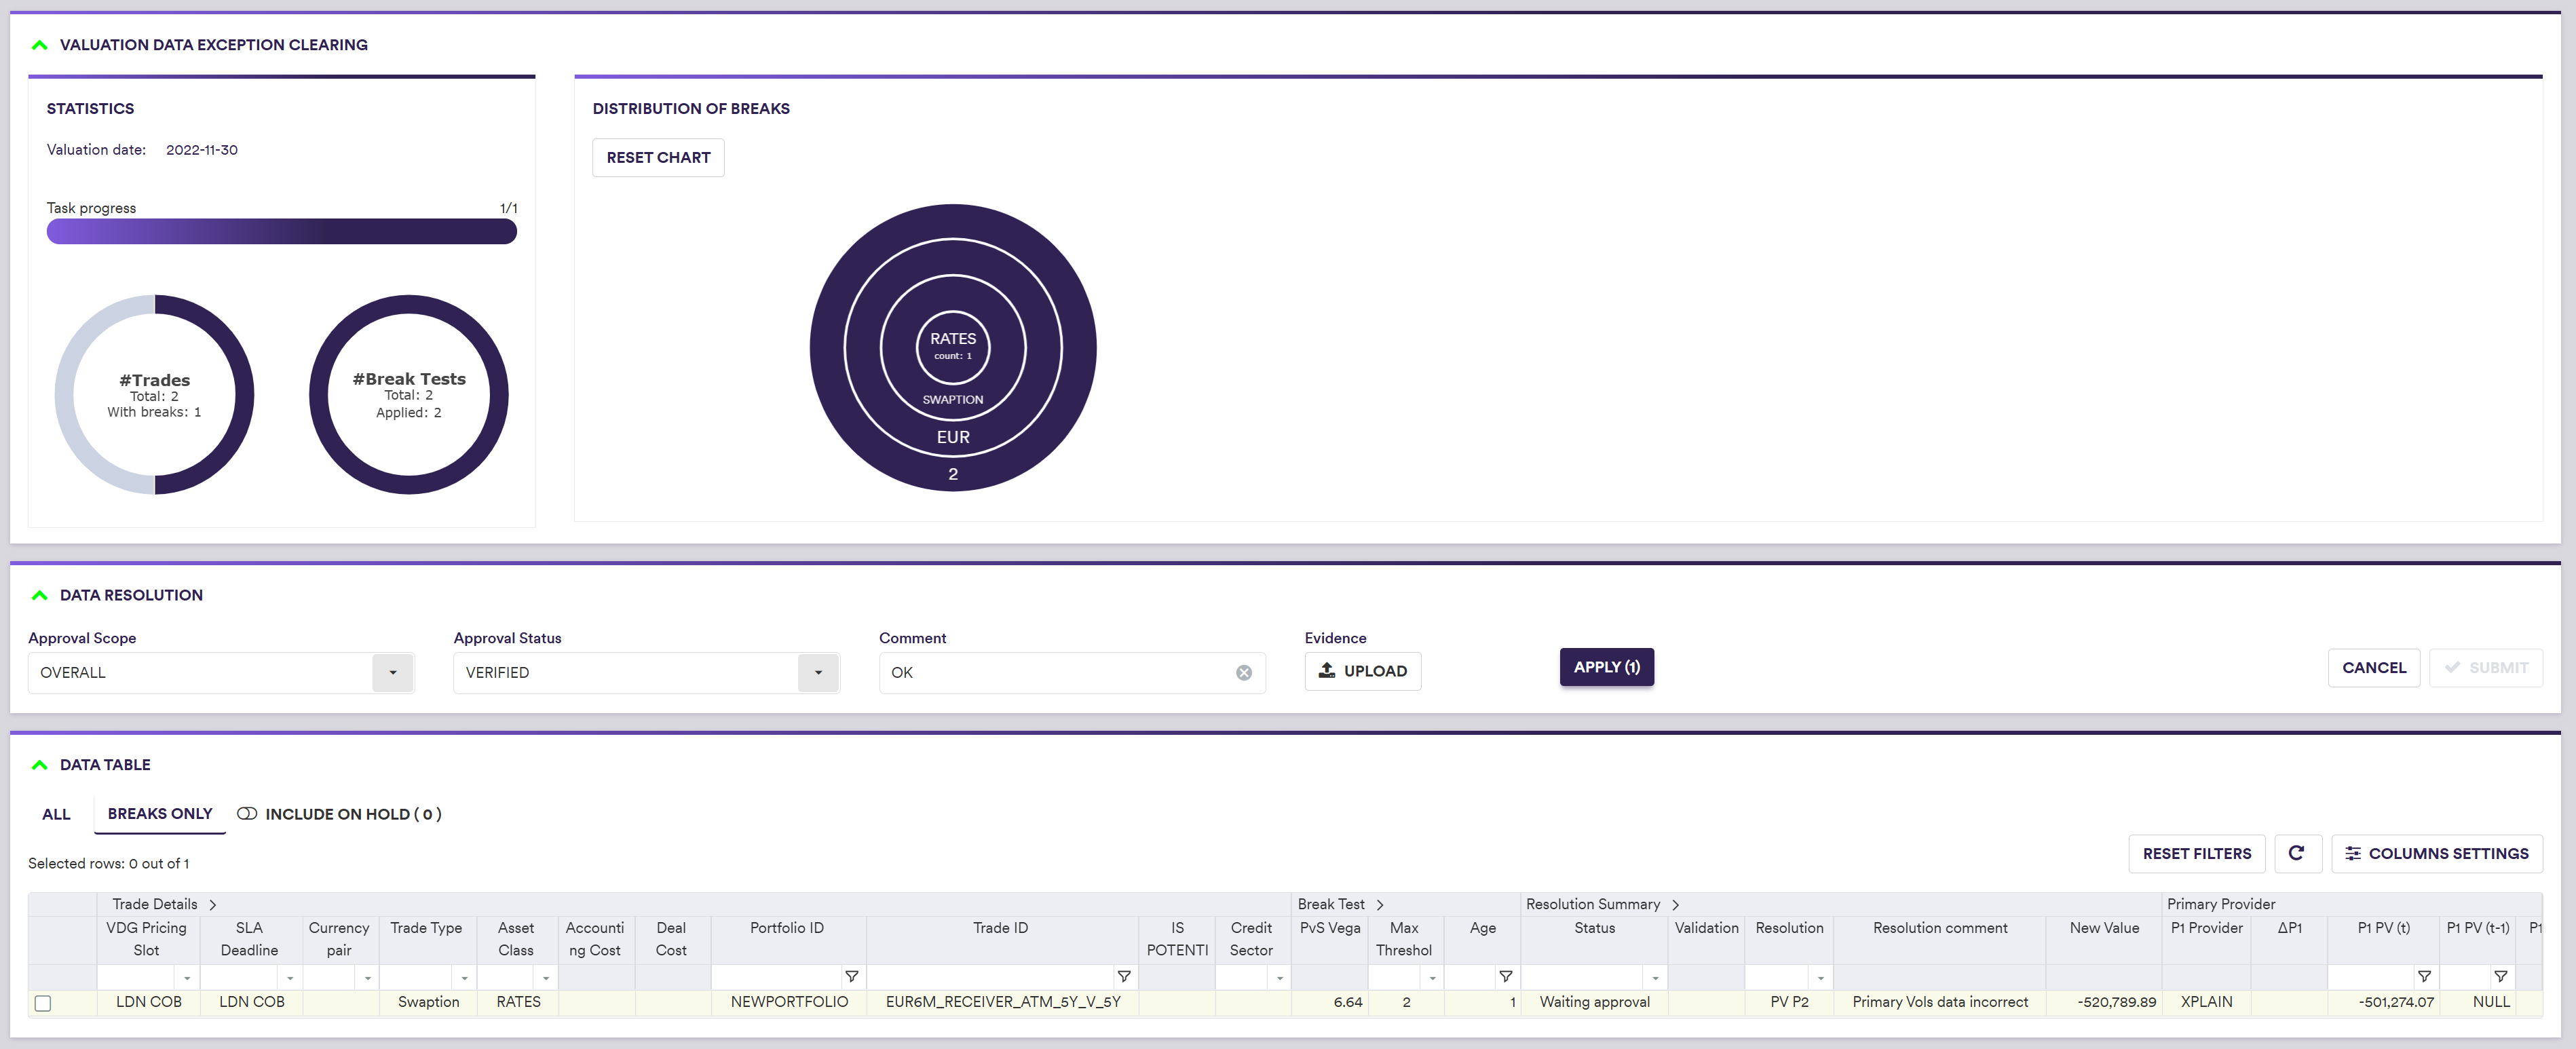
In addition to setting your preferred display configuration, you can:
- view all or only VDKs with breaks (by clicking on either “ALL” or “BREAKS ONLY” in the Data Table)
- filter by Data Provider, Instrument Type, etc.
Supporting evidence can be uploaded prior to submission by clicking on
A description of the approval scope and status and corresponding permissible values are set out in the table below.
After applying and submitting ‘VERIFIED’ as your approval action, the VD XM workflow should look like this:
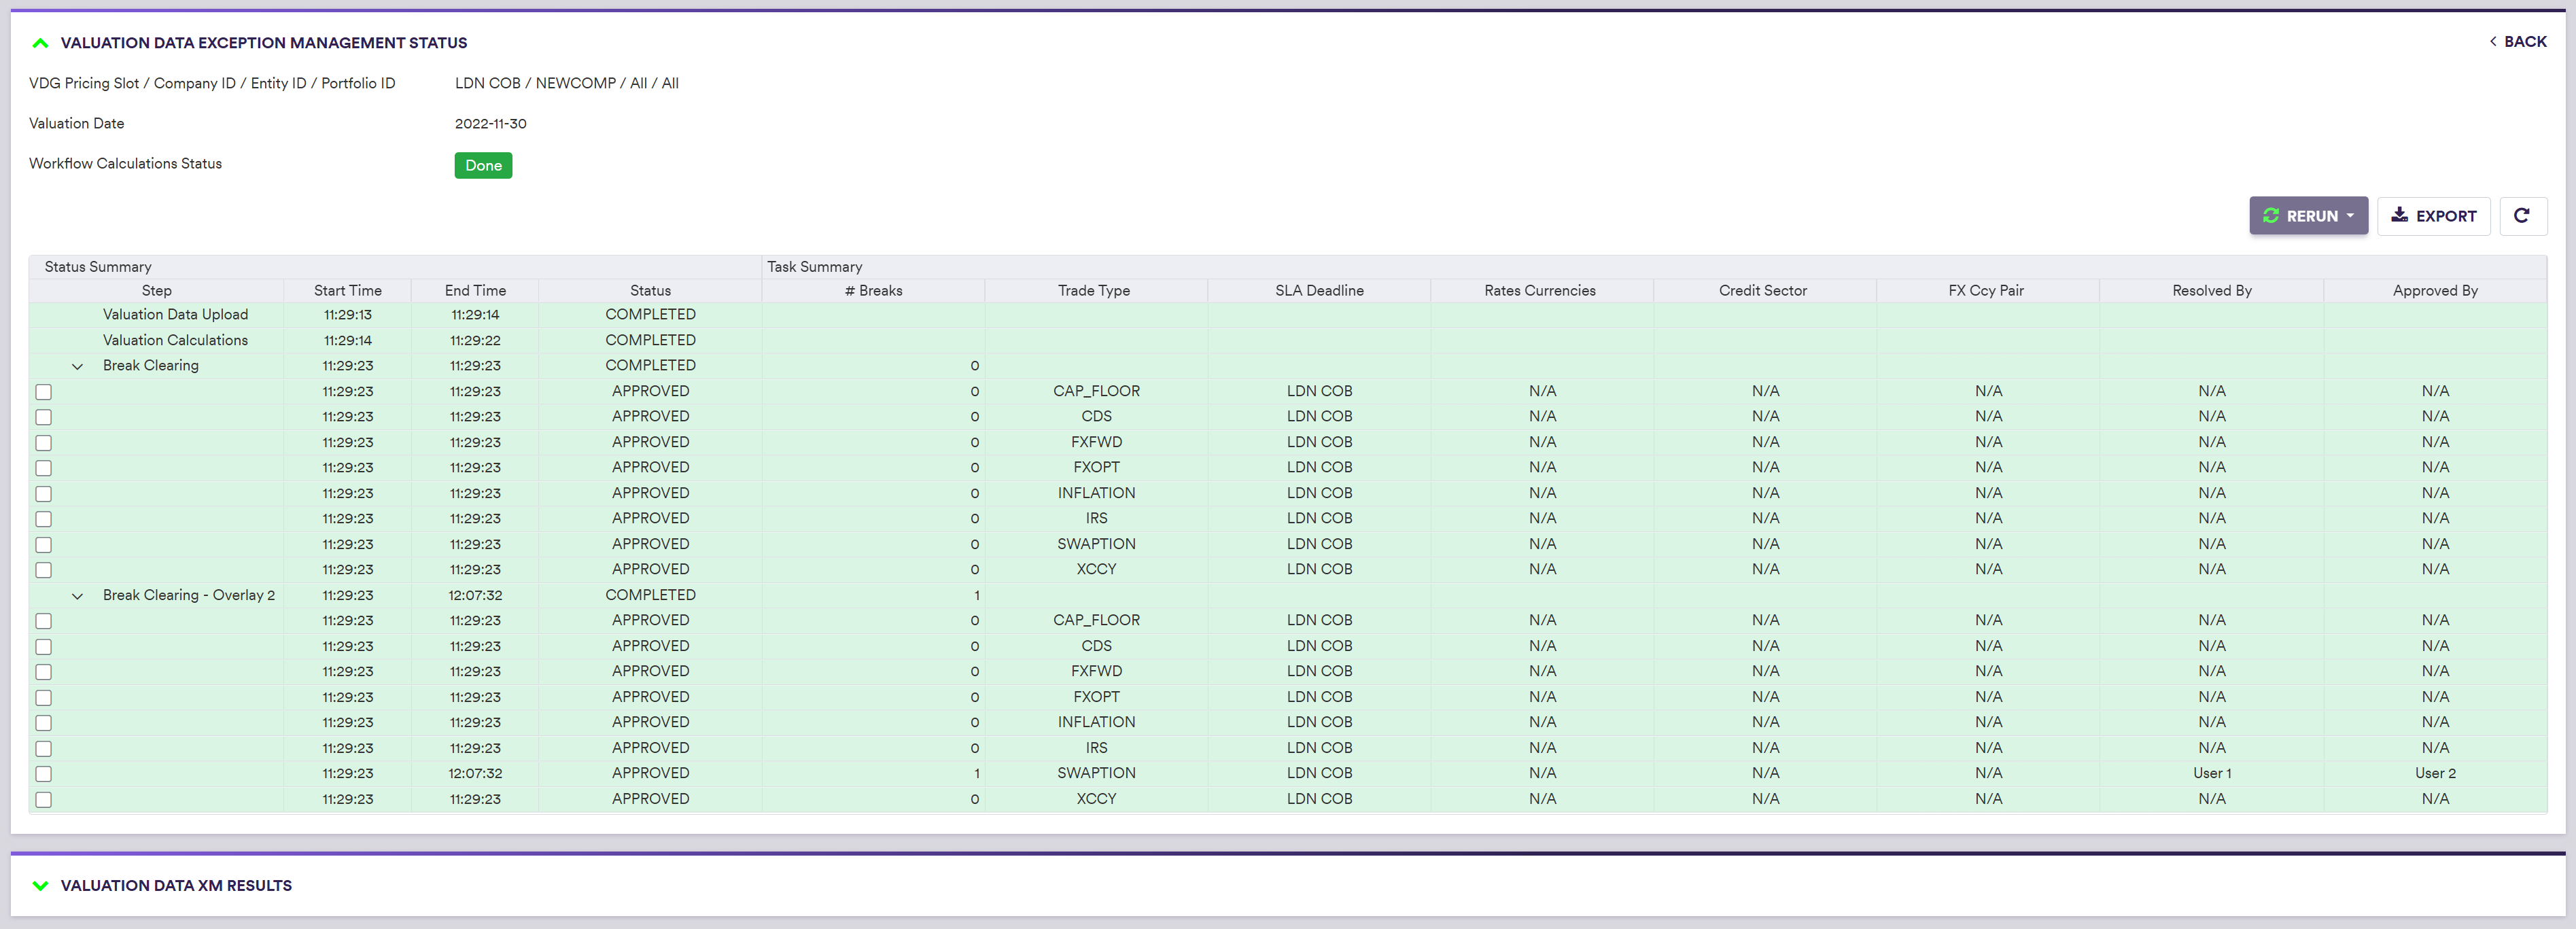
If a resolution is rejected however, the task(s) will go back to (or be re-created with) the status of ‘NOT_STARTED’ in the resolver task list panel.